How to Use a Wireless Meat Thermometer for Perfect Cooking
Learn how to use a wireless meat thermometer for precise cooking. This guide covers setup, probe placement, and monitoring for safe, delicious results.

Intro
This guide explains how to use a wireless meat thermometer, ensuring your food reaches the correct internal temperature for both safety and flavor. Monitoring internal temperatures prevents undercooked or overcooked meals, providing consistent results.
What You’ll Need
- Wireless meat thermometer (e.g., Best Wireless Meat Thermometer For Smoking)
- Meat for cooking
- Charging cable (for the thermometer)
- Smartphone or receiver device
Step 1: Charge the Thermometer
Fully charge your wireless meat thermometer before its first use. Most devices require several hours for a complete charge, ensuring up to 40 hours of continuous monitoring. Use the charging cable provided with your specific model.
Step 2: Connect to Your Device
Power on the thermometer and its receiver or open the companion app on your smartphone. Follow the manufacturer’s instructions to pair the thermometer via Bluetooth or Wi-Fi, establishing a connection for data transmission. This link allows real-time temperature updates.
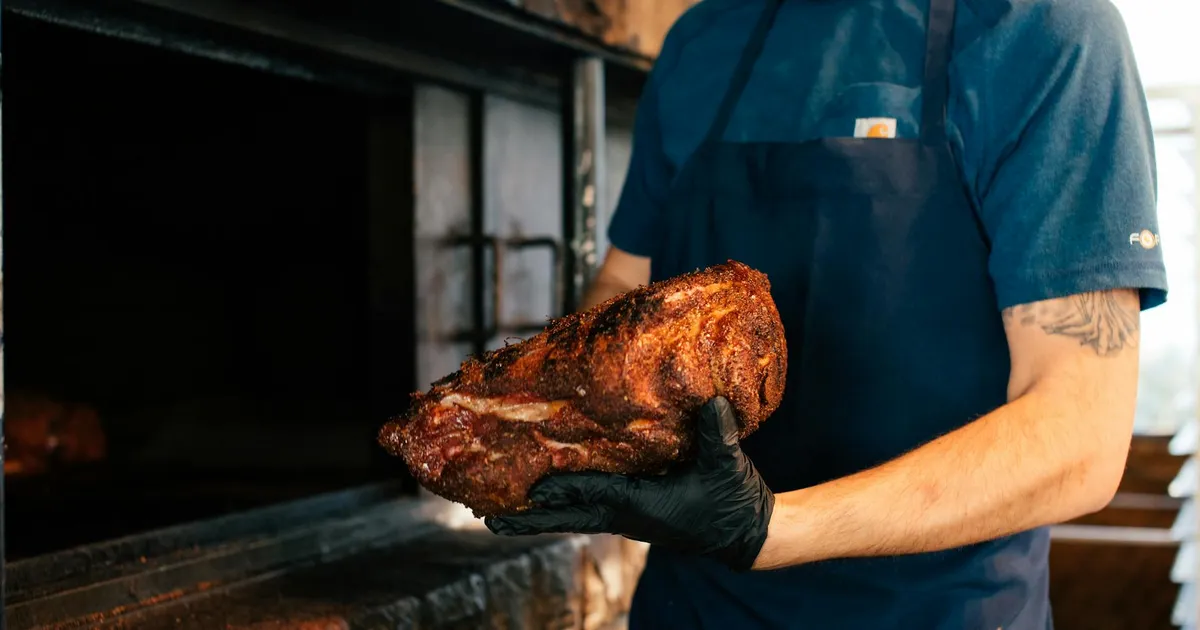
Step 3: Insert the Probe Correctly
Insert the thermometer probe into the thickest part of the meat, avoiding bones or large pockets of fat. Bones conduct heat differently, and fat can give inaccurate readings, potentially off by 2 degrees. For poultry, target the thickest part of the thigh, not touching bone.
Step 4: Set Desired Temperature
Use the app or receiver to select the target internal temperature for your specific meat. For example, poultry should reach 165°F (74°C) for safe consumption, while beef medium-rare is 130-135°F (54-57°C). The device will alert you when this temperature is achieved.
Step 5: Monitor Cooking Progress
Place the meat in your oven, grill, or smoker, ensuring the probe remains securely in place. Monitor the temperature readings on your connected device from a distance. Some thermometers can withstand ambient temperatures up to 932°F (500°C) for the probe, and 221°F (105°C) for the handle.
Step 6: Remove and Rest Meat
Once the target temperature is reached, carefully remove the meat from the heat source. Allow the meat to rest for 5-10 minutes; this allows juices to redistribute and the temperature to equalize, sometimes increasing by a few degrees. Always verify with an instant-read thermometer if unsure.
Tips and Best Practices
- Calibrate your thermometer annually to ensure accuracy within 0.3°C.
- Clean the probe thoroughly with soap and water after each use to prevent bacterial contamination.
- Keep the receiver or smartphone within the specified range for consistent signal reception.
- Consult USDA guidelines for safe internal cooking temperatures for various meats.
- Consider a Best Wireless Meat Thermometer For Grilling for outdoor cooking.
Common Mistakes
- Inserting the probe too close to a bone, which can lead to falsely high readings.
- Not fully charging the thermometer, causing it to die during a long cook.
- Ignoring the manufacturer’s instructions for initial setup and pairing.
- Removing the meat immediately when the target temperature is hit, skipping the crucial resting period.
FAQ
Q: Why is internal temperature important for cooking meat? A: Measuring internal temperature ensures meat is cooked safely to kill harmful bacteria and prevents overcooking, resulting in better texture and flavor. For example, ground beef must reach 160°F (71°C).
Q: Can I use a wireless meat thermometer in an oven? A: Yes, most wireless meat thermometers are designed for use in ovens, grills, and smokers. The probe and cable are typically heat-resistant.
Q: How far can I be from my wireless meat thermometer? A: The range varies by model, but many Bluetooth models offer a range of up to 150-200 feet, while Wi-Fi models can extend further, depending on your home network.
- meat-thermometers
- meat